A screen protector is an essential accessory for any iPhone user looking to protect their device’s display. Screen protectors create a protective layer over the iPhone’s screen to prevent scratches, cracks, and other damage from everyday use and accidental drops. With the average person checking their phone over 80 times per day, iPhone screens are constantly exposed to potential damage.
According to a report by Grand View Research, the global smartphone screen protector market size was estimated at $49.73 billion in 2022 and is expected to grow at a compound annual growth rate of 5.4% from 2023 to 2030 as more consumers seek to protect their expensive smartphone displays. Screen protectors provide peace of mind for iPhone users invested in keeping their device’s screen in pristine, like-new condition.
Gather Materials
Before applying the screen protector, you’ll need to gather the necessary materials:
- Screen protector – Make sure to use a high-quality tempered glass screen protector designed specifically for your iPhone model. Top brands like ZAGG and Spigen make screen protectors that provide premium protection against scratches and cracks (The 2 Best iPhone Screen Protectors of 2024 – Wirecutter)
- Microfiber cloth – Use a lint-free microfiber cloth to thoroughly clean the iPhone screen before application
- Sticker or tape – Helpful for removing dust particles and lint
- Dust remover – Specialized cleaning wipes or compressed air help remove stubborn dust
Having all these materials ready beforehand will make the screen protector application process much smoother.
Clean the Screen
Before applying the screen protector, it’s important to thoroughly clean the iPhone’s screen. This removes any dust, oil, or debris that could get trapped under the screen protector and impact adhesion or clarity.
Use a microfiber cloth designed for cleaning screens and devices. If needed, you can dampen the microfiber cloth slightly with distilled water to help cut through oils and fingerprints. Make sure the screen is completely dry before moving on to the next step.
You can also use a can of compressed air or a dust remover spray to blow away any remaining dust particles on the screen. Hold the can or spray 6-8 inches away from the phone and spray in light, quick bursts across the screen to dislodge anything stuck on. This helps ensure no dust gets trapped underneath the screen protector.[1]
Do not use rubbing alcohol or other cleaning chemicals on the iPhone’s screen, as they can strip away oleophobic coatings that protect against fingerprints and smudges. Stick to a slightly damp microfiber cloth and compressed air for best results.[2]
Remove Any Cases
Before installing the screen protector, it’s important to remove any cases that are on your iPhone. Cases can sometimes interfere with getting a perfectly straight and smooth application of the screen protector. Removing the case allows you to cleanly align the screen protector and apply it to the bare screen.
Be sure to have a clean, empty work area to place any removed cases so they don’t get dusty or dirty while you apply the screen protector. You can easily reapply the case after the screen protector is securely installed.
Align the Screen Protector
Properly aligning the screen protector before adhering it is crucial for getting a bubble-free application. According to reddit users, the best way to align an iPhone screen protector is to first hold it with one hand while lining up the top edge with the earpiece speaker cutout. This helps get it straight. Then use your second hand to gently lower the screen protector, holding the edges to prevent it from shifting. Go slowly and adjust as needed until the alignment is perfect. The screen protector should sit flush with the curved edges of the display.
You can also use a screen protector alignment tool or card to help guide the protector into place and prevent air bubbles during application. Gently slide the tool or card from top to bottom or side to side to push out any air or liquid underneath. This smoothing motion ensures proper adhesion across the entire surface.
Taking your time to get the alignment right is the most important step. Rushing through it can lead to a crooked or bubble-filled screen protector that will need to be reapplied.
Remove Adhesive Backing
With the screen clean and free of residue, you’re ready to apply the new screen protector. Start by peeling off the adhesive backing from the protector. Go slowly and peel from one corner, taking care not to let the adhesive fold over and stick to itself. Some screen protectors have multiple layers of adhesive backing to peel off.
According to discussions on the Apple website, you may want to use scotch tape or masking tape to lift any remaining sticky residue from the protector backing as you peel it off (Apple Discussions). This prevents any glue from getting onto the screen surface. Take as much time as needed to fully remove the backing.
Apply the Screen Protector
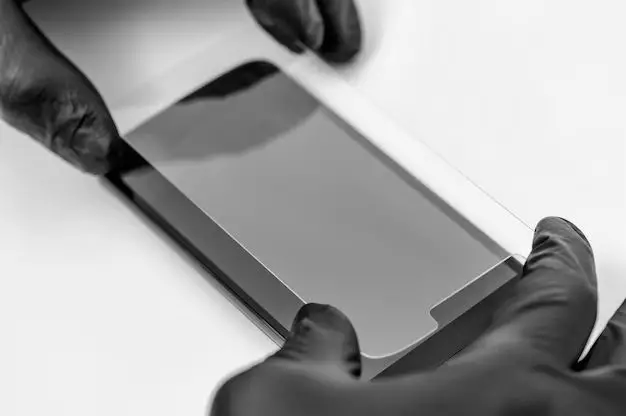
Once you have removed the adhesive backing, it’s time to carefully apply the screen protector onto your iPhone’s display. Go slowly and be precise with placement, as you likely won’t get a second chance. According to experts, the best method is to align the bottom edge of the screen protector with the bottom of your iPhone’s display first. Then, gently lay the screen protector down and use the provided stickers or tape to secure the edges and adjust alignment if needed.
Try to avoid touching the adhesive side of the screen protector and handle it only by the edges. Be patient and take your time, carefully lowering the screen protector into place. It can take a few tries to get the alignment perfect. Once applied, press firmly from the center outward to adhere the screen protector to the display and smooth out any bubbles or creases.
Smooth Out Bubbles
After applying the screen protector, it’s common to have small air bubbles or pockets of air that got trapped during the application process. To smooth these out, use the cloth included with the screen protector kit to gently press out the bubbles.
Start from the center of the screen protector and smooth outward, being careful not to lift the edges. The microfiber cloth can help adhere the protector by pushing out the air bubbles to the sides.
As you press, watch for larger bubbles to shrink down and eventually disappear. Be patient and take your time during this step. Removing bubbles gets easier as you work from the middle outwards.
If any stubborn bubbles remain, try a soft rubbing motion or very light tapping on the protector over the bubble. This can help break the air pocket so the bubble will smooth out.
Refer to the screen protector manufacturer’s instructions for guidance on removing bubbles. Some brands recommend using a blow dryer on a low setting to heat the screen protector and make bubbles easier to push out.
Only attempt this heating method if suggested by the manufacturer. Avoid overheating, which can damage the protector and your iPhone screen.
With some persistence, you should be able to smooth out even tiny bubbles for a bubble-free application. Be patient and work slowly to avoid damaging or lifting the protector.
Re-apply Case
Once the screen protector is successfully applied without any bubbles or gaps, it’s time to put the iPhone case back on, if you removed one earlier. Start by carefully lining up the case with the ports and buttons on the phone. Gently press the phone into the case, snapping the edges into place. Take care not to shift or lift the screen protector when applying pressure to snap the case together.
If you notice any bubbles or lifting at the edges after putting on the case, don’t worry. Use a piece of scotch tape to gently press the screen protector back down, smoothing out any gaps or bubbles. You can also use a credit card to sweep out from under the protector edges. Refer to online videos for techniques on reseating a screen protector with a case already on.
Conclusion
If you followed all of the steps carefully, your new screen protector should now be successfully applied to your iPhone. With the protector smoothly adhered and bubbles removed, you can enjoy scratch protection and peace of mind knowing your iPhone’s display is safe from harm. The screen will maintain responsiveness with the thin overlay and you should barely notice it’s there after regular use. Check for full adhesive adhesion after 24 hours. Overall the application process takes patience and care, but is very doable with some basic materials and following the proper techniques. Your new iPhone screen protector will serve you well!


